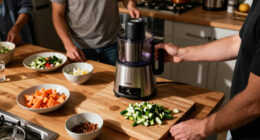
Set up one smart kitchen gadget, connect it to its app and home Wi-Fi, then run a test to confirm its connected features work. This guide is for beginners setting up a device such as a smart plug, thermometer, scale, coffee maker, or countertop appliance. Plan for 30-60 minutes, including time for app installation and troubleshooting.

Get kitchen gear delivered free with Prime
- Fast, free delivery on millions of items
- Prime Video, Amazon Music and more included
- Member-only deals all year

Etekcity Food Kitchen Scale with Nutritional Calculator, Smart App, 11 lb
- ✔ Weight capacity: 11 lb (5,000 g)
- ✔ Increment value: 1 g
- ✔ Units: oz, lb, g, ml (water and milk)
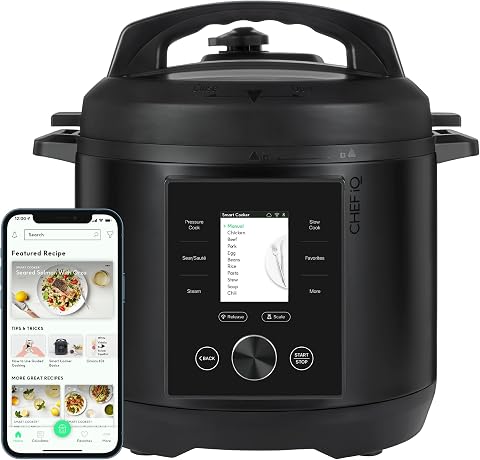
Chef iQ Smart Pressure Cooker with WiFi and Built-in Scale – 10-in-1 Multicooker, 6-Quart Family Size
- ✔ Capacity: 6 quarts
- ✔ Cooking modes: 10-in-1 multicooker
- ✔ Connectivity: Wi-Fi and Bluetooth
Difficulty: Beginner | Time: 30-60 minutes
What You’ll Need
Tools & Materials:
- Smart kitchen gadget and its power cable or batteries
- Phone or tablet with internet access
- Manufacturer’s app
- Home Wi-Fi name and password
- User manual or setup card
Knowledge:
- Basic ability to install an app and connect a phone to Wi-Fi
- Ability to identify your home Wi-Fi network and enter its password
Check the device manual for supported Wi-Fi bands, voltage, placement, and cleaning instructions. Many devices require a 2.4 GHz Wi-Fi network during setup. Keep the gadget unplugged until its manual says to power it on. Do not connect appliances that heat, cool, chop, or pump liquid to a smart plug unless both manufacturers explicitly allow that use.
Etekcity Food Kitchen Scale with Nutritional Calculator, Smart App, 11 lb
The Etekcity scale makes the most sense when our definition of a smart kitchen is better measurement and food awareness. It weighs ingredients in one-gram increments up to 11 pounds, then connects with the VeSync app to track as many as 19 nutrients. That gives it a more focused role than the Chef iQ: we can use it alongside any mixing bowl, pan, or cooking appliance we already own instead of shifting meal preparation to a connected cooker.Its 304 stainless steel platform is easy to wipe clean, and the scale supports ounces, pounds, grams, and milliliters for water and milk. The adjustable backlight timer can help keep the display visible during longer prep sessions. Apple Health and Fitbit syncing may also suit people who already keep food or activity data in those services. These features make it practical for weighing baking ingredients, tracking portions, or logging food as we cook.The tradeoff is that the scale’s intelligence depends on its app, and VeSync functionality is currently limited to the United States. It also takes three AAA batteries rather than offering a rechargeable option. Compared with Chef iQ, it cannot guide a recipe or cook a meal, but it is far less demanding in counter space and changes fewer kitchen habits. We should pick it for specific measuring and tracking needs, not if we want an appliance to automate cooking.
Pros:
- Tracks up to 19 nutrients through the VeSync app.
- Syncs with Apple Health and Fitbit.
- Offers an 11-pound capacity with one-gram increments.
- Stainless steel platform is simple to clean and supports several units.
Cons:
- Requires three AAA batteries and has no rechargeable option.
- App functionality is currently limited to the United States.
Best for: Home cooks who want precise ingredient measurements and app-based nutrition tracking in a compact gadget.
Not ideal for: Buyers outside the United States who need full app functionality, or anyone looking for guided recipes and automated cooking.
Bottom line: For connected portioning and nutrition logging with minimal kitchen disruption, we would choose the Etekcity scale over the much larger Chef iQ cooker.
“For connected portioning and nutrition logging with minimal kitchen disruption, we would choose the Etekcity scale over the much larger Chef iQ cooker.”
Chef iQ Smart Pressure Cooker with WiFi and Built-in Scale – 10-in-1 Multicooker, 6-Quart Family Size
Where Etekcity helps us measure what goes into a meal, the Chef iQ Smart Pressure Cooker helps us turn ingredients into one. Its built-in scale reduces the need to measure separately, while Wi-Fi and Bluetooth connect the cooker to an app with guided video recipes. For cooks who appreciate step-by-step direction, this can make an unfamiliar dish feel more approachable. Its six-quart capacity is suited to family-sized portions, giving it a broader cooking role than the small Etekcity scale can offer.The cooker’s automatic pressure release provides quick, pulse, and natural release methods, so we have options for finishing different recipes. It also has multiple preset functions and a 1,000-watt programmable rating. The combined measuring and cooking setup can streamline a recipe that calls for weighing ingredients and then pressure cooking them. Compared with the scale, Chef iQ does much more in one appliance, but that makes it a more substantial purchase in terms of space, setup, and reliance on the app.We should check the connectivity and regional limits before making it our main cooking gadget: connected functionality may be limited without internet access, and the device and app are not recommended outside the United States and Canada. At 10.4 pounds and about 13 inches in each dimension, it can occupy meaningful counter or storage space. It suits buyers ready to use a smart multicooker regularly; those who mainly want accurate weighing will find Etekcity simpler and more adaptable.
Pros:
- Built-in scale can simplify measuring ingredients for recipes.
- App provides guided video recipes over Wi-Fi and Bluetooth.
- Automatic pressure release offers quick, pulse, and natural methods.
- Six-quart capacity supports family-sized meals.
Cons:
- Connected features may be limited without Wi-Fi or Bluetooth access.
- Heavy, bulky body takes up significant counter or storage space.
- Device and app are not recommended outside the United States and Canada.
Best for: Families and less experienced cooks who want app-guided recipes, pressure cooking, and ingredient weighing in one appliance.
Not ideal for: Cooks with limited counter or storage space, those who prefer offline appliances, or buyers outside the United States and Canada.
Bottom line: We recommend Chef iQ when guided one-pot cooking is the goal, while the Etekcity scale is the better fit for buyers who mainly need smart measuring.
“We recommend Chef iQ when guided one-pot cooking is the goal, while the Etekcity scale is the better fit for buyers who mainly need smart measuring.”
As an Amazon Associate we earn from qualifying purchases.
Before You Start
Choose a location near the router for initial setup, with a stable surface and access to a suitable outlet. Keep the device away from sinks, stovetops, and hot surfaces unless its instructions specify that the location is safe. Download the official app from your phone’s app store; check the publisher name against the manual or manufacturer’s website. Have the Wi-Fi password ready, and use a strong, unique password if the app asks you to create an account.
Review the manual before handling blades, hot plates, pressure systems, or water reservoirs. Keep the device switched off while filling, cleaning, or attaching parts. Never bypass a physical safety feature to use an app function.
Step-by-Step Instructions
Step 1: Inspect the device and identify its requirements
Unpack the gadget and compare its parts with the manual’s list. Look for damaged cables, cracked housings, missing seals, or loose components. Find the model number, power rating, and supported Wi-Fi band on the label or in the app instructions. Confirm the device is intended for your country’s power supply and that its planned location meets the manual’s clearance and ventilation instructions.
Tip: If you find damage, do not plug in the device. Contact the retailer or manufacturer with the model and a description of the issue.
Check: All listed parts are present, the device has no visible damage, and its power and network requirements match your home setup.
Step 2: Install the manufacturer’s app
Open your phone’s app store, search for the app named in the manual, and check that the publisher matches the manufacturer. Install it, open it, and allow only the permissions needed for setup. Bluetooth or local-network access may be needed to discover the gadget; location permission may be required by some phone systems during Wi-Fi discovery. You can review or change app permissions in your phone settings later.
Tip: Avoid scanning a QR code from packaging if it opens an unfamiliar download page. Find the app in the official app store instead.
Check: The app opens without an installation error and displays an option to add or set up a device.
Step 3: Create an account or sign in
Follow the app’s prompts to create an account or sign in. Use an email address you can access and choose a unique password. Complete any email verification step before adding the gadget. If the app offers multifactor authentication, turn it on and save any recovery codes in a secure place.
Tip: Do not reuse your email password for the gadget account. Skip optional marketing permissions if you do not want them.
Check: The app shows its home screen or device list, and you can access the add-device option.
Step 4: Power on the gadget and enter pairing mode
Place the gadget in the selected setup location, then connect its power or insert batteries as the manual directs. Turn it on and activate pairing mode using the named button or control sequence. Watch for the indicator light, display message, or sound described in the manual. Keep the phone close to the gadget while pairing.
Tip: Use the manual’s pairing instructions for the exact model. A long press may reset some devices and erase saved settings.
Check: The device shows the pairing indicator or message specified in its instructions.
Step 5: Add the gadget in the app
In the app, tap the option to add a device and select the correct product type or model. Follow the prompts to discover the gadget, using Bluetooth or scanning its setup code if requested. Confirm the device name or identifier shown in the app matches the label on your gadget. Do not approve a nearby device you cannot identify.
Tip: If discovery fails, move the phone closer and check that Bluetooth and the requested local-network permission are enabled.
Check: The app identifies your gadget and advances to network setup or device configuration.
Step 6: Connect it to home Wi-Fi
Select your home network from the app’s list and enter its password carefully. If setup fails, check the manual for supported bands; switch the phone to the required network or enable the router’s 2.4 GHz network if the gadget requires it. Keep the phone on the same home network during setup, and wait for the app to confirm the connection before leaving the screen.
Tip: A guest network, captive portal, or network that blocks device-to-device traffic may prevent setup. Use your regular home network unless the manual says otherwise.
Check: The app reports that the gadget is online, or its network indicator changes to the connected state shown in the manual.
Step 7: Name the device and configure basic settings
Give the gadget a clear name that identifies its location or purpose, such as “Kitchen scale” or “Coffee maker.” Set the correct time zone, units, temperature scale, or measurement preferences if prompted. Review alerts and notification settings, then enable only those you want to receive. If the app requests access to a voice assistant or another service, connect it only if you plan to use that feature.
Tip: Avoid names such as “Device 1” if you expect to add more gadgets; clear names make app controls easier to distinguish.
Check: The device appears in the app with a recognizable name and the expected units or basic preferences.
Step 8: Test a basic function and review safety controls
Run a low-risk test described in the manual. For a thermometer, compare its reading with the display; for a scale, weigh a known item; for a coffee maker, test its app status without leaving it unattended. Check any remote start, timer, or notification feature only under conditions the manual permits. Keep hands clear of moving parts and stay near any heating or water-handling appliance while testing.
Tip: A connected status does not mean an appliance is safe to operate unattended. Follow its manual’s supervision and use restrictions.
Check: The test produces the expected reading or response, the app updates its status, and any intended alert arrives on your phone.
Step 9: Update software and record support details
Check the app and device settings for a firmware update. Keep the gadget powered and connected while an update runs; do not unplug it or close the app if the instructions warn against doing so. When the update finishes, note the model and serial number somewhere accessible, and keep the manual and support contact details.
Tip: If an update appears during initial setup, let it finish before testing connected controls.
Check: The app shows that the device is up to date, or confirms that no update is available.
Common Mistakes to Avoid
- Selecting the wrong Wi-Fi band or entering the password incorrectly. — Check the manual’s band requirements, select the matching network, and re-enter the password with attention to capitalization and special characters.
- Using an unofficial or similarly named app. — Verify the app publisher against the manual or manufacturer’s website before installing or entering account details.
- Pairing the gadget far from the router or phone. — Set it up near the router and keep the phone beside it until the app confirms the connection.
- Assuming app control makes a device safe to leave unattended. — Follow the appliance manual’s supervision rules, especially for heat, blades, pressure, or water.
Troubleshooting
Problem: The app cannot find the gadget.
Solution: Confirm it is powered on and in pairing mode, move the phone closer, and enable Bluetooth and any requested local-network permission. Restart pairing using the model’s instructions; avoid factory reset unless the manual recommends it.
Problem: Wi-Fi setup fails even though the password is correct.
Solution: Check whether the device requires 2.4 GHz Wi-Fi, then connect the phone to that network and retry. Disable a VPN temporarily if the app’s instructions identify it as a setup issue. If the router uses a guest network, try the regular home network.
Problem: The device appears offline after setup.
Solution: Check that the router is online and the gadget has power. Move it closer to the router, reopen the app, and wait for its status to refresh. If the router password or network name changed, reconnect the gadget through its network settings.
Problem: The app shows a reading or status that does not match the device.
Solution: Refresh the app, check its units and time settings, and follow the manual’s calibration or sensor placement instructions. Restart the gadget if the manual permits. Contact support if readings remain inconsistent.
What Success Looks Like
The gadget is safely placed, appears online in the official app under a clear name, and responds correctly to a basic test. Its readings or status match the expected result, and any configured notification reaches your phone. You can identify its physical power control and know which functions require supervision.
Next Steps
Use the gadget according to its manual, and check the app periodically for connection or update notices. Clean it only as the manufacturer directs, disconnecting power first when required. If you move it or change your Wi-Fi name or password, follow the app’s network update process. Add other kitchen devices one at a time so you can confirm each one’s compatibility and safe placement.
Frequently Asked Questions
Do smart kitchen gadgets need a 2.4 GHz Wi-Fi network?
Some do, while others support 5 GHz or both bands. Check the manual for your exact model. If it requires 2.4 GHz, connect your phone to that band during setup when the app asks.
Can I control a kitchen appliance with a smart plug?
Only if the plug and appliance manufacturers permit that combination. Avoid using smart plugs with appliances that heat, cool, chop, or pump liquid unless both manuals explicitly allow it. The plug must also support the appliance’s electrical load.
Can I use the gadget if my internet goes out?
Physical controls may still work, but app, voice, remote, or cloud features may stop. The manual or app support page explains which functions work locally without internet.
What should I do before changing my router or Wi-Fi password?
Check the app for a way to update the gadget’s network details. After the change, reconnect each device using its setup instructions; some models require pairing mode again.