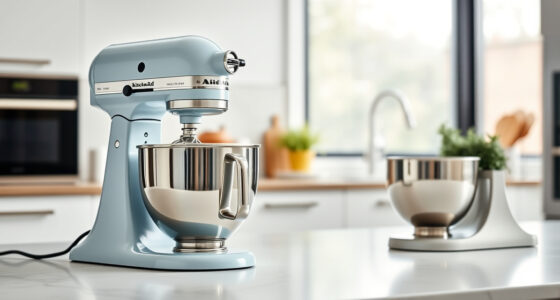

If your KitchenAid Artisan Series 5 Quart Tilt Head Stand Mixer is making a grinding noise, it can be both frustrating and concerning. This guide provides clear, safe steps to diagnose and fix the issue, helping you restore your mixer’s quiet performance and prolong its lifespan. Understanding common causes and performing simple maintenance can save you time and money, avoiding unnecessary repairs or replacements.

Get kitchen gear delivered free with Prime
- Fast, free delivery on millions of items
- Prime Video, Amazon Music and more included
- Member-only deals all year
Before starting, ensure your mixer is unplugged, and familiarize yourself with the mixer’s parts. A few basic tools, such as a screwdriver and a soft cloth, will be helpful. Let’s explore how to troubleshoot and fix the grinding noise effectively.
Key Takeaways
| Identify the cause | Grinding noise often results from worn gears, debris, or lubrication issues. |
| Safety first | Always unplug your mixer before performing maintenance. |
| Clean and inspect | Regular cleaning and inspection can prevent grinding sounds. |
| Replace worn parts | Worn gears or bearings may need replacement for quiet operation. |
| Routine lubrication | Proper lubrication of moving parts reduces noise and wear. |
Step 1: Unplug and Prepare Your Mixer
- Ensure the mixer is unplugged from the power outlet to prevent accidents.
- Remove the attachment and the mixing bowl.
- Place the mixer on a stable, flat surface for easy access.
Having the mixer in a safe, accessible position makes inspecting internal components safer and more straightforward.
Step 2: Access the Gears and Internal Components
- Use a screwdriver to remove the rear cover or the top head of the mixer, depending on your model.
- Carefully disconnect any visible gear covers, noting their orientation.
- Inspect the gears, belt, and internal moving parts for wear, damage, or debris.
What you’re looking for are chipped, cracked, or worn gears, as well as any foreign objects that might be causing the grinding sound.
Step 3: Clean and Lubricate Moving Parts
- Wipe away dust, old grease, and debris with a soft cloth.
- If your model allows, apply a small amount of food-grade or manufacturer-recommended lubricant to gears and bearings.
- Be cautious not to over-lubricate, as excess lubricant can attract dust and worsen the problem.
This step can reduce noise caused by friction and ensure smooth gear operation.
Step 4: Replace Worn or Damaged Parts
If you find chipped, cracked, or excessively worn gears, replacing them is the best solution. Contact KitchenAid customer service or authorized parts suppliers to get genuine replacement parts. Follow the manufacturer’s instructions for replacing gears or bearings, or seek professional repair if needed.
Using original parts ensures compatibility and long-term durability.
Step 5: Reassemble and Test Your Mixer
- Carefully reattach the gear covers and reassemble the mixer in reverse order of disassembly.
- Ensure all screws and panels are secure.
- Plug in the mixer and run it at low and high speeds to test for noise.
If the grinding sound persists, revisit the internal components or consult a professional technician.
The Products in This Guide

KitchenAid Artisan Series 5 Quart Tilt Head Stand Mixer
- ✔ Weight: 26 lbs
- ✔ Warranty: 1 year
- ✔ Included Accessories: Pouring shield, flat beater

KitchenAid Stand Mixer Attachment
- ✔ Weight: 4.4 lbs
- ✔ Warranty: N/A
- ✔ Included Tools: Cleaning brush
KitchenAid Artisan Series 5 Quart Tilt Head Stand Mixer
The KitchenAid Artisan Series 5 Quart Tilt Head Stand Mixer is built with durable metal construction, offering reliable performance for various recipes. Its tilt-head design provides easy access to the bowl, making it convenient for regular maintenance and cleaning. Despite occasional noise issues, its high-quality build and versatile speeds make it a favorite among home bakers.
Pros:
- Durable metal construction
- Easy tilt-head access
- Multiple speed settings
- Large 5-quart bowl
Cons:
- Can develop noise over time
- Requires occasional gear maintenance
- Not dishwasher safe for internal parts
Best for: Home bakers and cooking enthusiasts seeking reliable performance.
Not ideal for: For those uncomfortable with DIY repairs or needing a quiet operation.
Bottom line: A durable, versatile mixer that benefits from regular maintenance to keep noise at bay.
KitchenAid Stand Mixer Attachment
The KitchenAid Metal Food Grinder attachment connects seamlessly with your stand mixer, allowing you to grind meat, vegetables, and more with ease. Its durable construction and multiple grinding plates make it a versatile addition, especially if you’re troubleshooting noise issues caused by internal wear or seeking expanded functionality.
Pros:
- Sturdy metal construction
- Multiple grinding plates
- Easy to attach
- Generates fresh, consistent grind
Cons:
- Additional cost
- Requires pre-chilling for best results
- Limited to compatible mixers
Best for: Home cooks wanting fresh ground ingredients and added versatility.
Not ideal for: For users who don’t frequently grind food or prefer pre-packaged options.
Bottom line: A robust addition that enhances your mixer’s functionality and helps with ingredient prep.
Frequently Asked Questions
Why is my KitchenAid mixer making a grinding noise?
The grinding noise may be caused by worn gears, debris caught inside the gear mechanism, or lack of lubrication. It’s important to inspect and maintain the internal components regularly.
Can I fix the grinding noise myself?
Yes, with proper tools and careful inspection, many common issues like debris removal, cleaning, and lubrication can be handled at home. However, replacing worn gears may require professional assistance.
Is it safe to open my KitchenAid mixer?
As long as you unplug the mixer and follow safety precautions, opening the casing for inspection or cleaning is generally safe. Always refer to the manufacturer’s instructions or consult a professional if unsure.
How often should I lubricate my mixer?
Lubrication depends on usage, but inspecting and lubricating gears once every 6-12 months can help keep your mixer running smoothly and quietly.
When should I replace internal parts?
If gears or bearings are chipped, cracked, or excessively worn despite cleaning and lubrication, replacing these parts is necessary to prevent further damage and restore quiet operation.
Keep Your KitchenAid Running Smoothly
Regular maintenance and prompt troubleshooting can keep your KitchenAid Artisan Stand Mixer operating quietly and efficiently. By following these steps—inspecting internal components, cleaning, lubricating, and replacing worn parts—you can extend its lifespan and enjoy trouble-free baking and cooking for years to come. Remember, safety first: always unplug your mixer before opening it up, and seek professional help if needed.
Affiliate disclosure: As an Amazon Associate we earn from qualifying purchases. Prices and availability are accurate as of the time of publishing.
Fall Picks
fall essentials
As an affiliate, we earn on qualifying purchases.