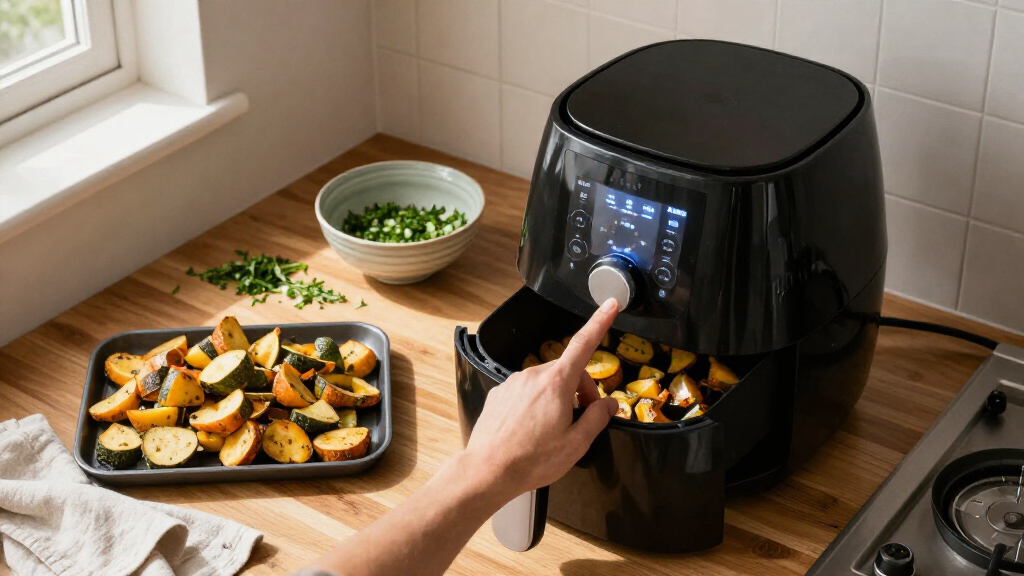

Use this guide to set up a digital touchscreen air fryer, choose a cooking method, and check your food before serving. It is for first-time users and anyone learning a new model. You will need about 30-45 minutes for setup and a first cooking session; actual cooking time depends on the food and the manufacturer’s instructions.

Get kitchen gear delivered free with Prime
- Fast, free delivery on millions of items
- Prime Video, Amazon Music and more included
- Member-only deals all year

BLACK+DECKER Purifry 6QT Digital Air Fryer
- ✔ Capacity: 6 QT
- ✔ Touchscreen presets: 9
- ✔ Maximum temperature: 400°F

Chefman 6 Quart Dual Basket Air Fryer
- ✔ Combined capacity: 6 quarts
- ✔ Basket layout: Two independent 3-quart baskets
- ✔ Temperature range: 200–450°F
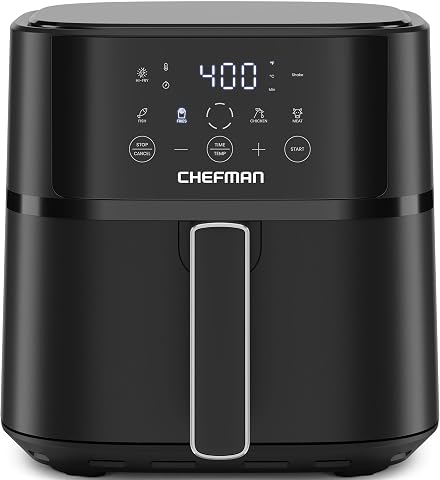
Chefman Air Fryer 6 QT Compact
- ✔ Capacity: 6 quarts
- ✔ Touchscreen presets: 4
- ✔ Maximum temperature: 450°F Hi-Fry option
Difficulty: Beginner | Time: 30-45 minutes for setup and a first cooking session
What You’ll Need
Tools & Materials:
- Digital touchscreen air fryer with its user manual
- Food suitable for air frying
- Heat-safe tongs or a spatula
- Oven mitts or heat-resistant gloves
- Food thermometer for meat, poultry, or other foods that need a temperature check
- Mild dish soap, a soft sponge, and a clean towel
Knowledge:
- Basic familiarity with plugging in and operating a countertop appliance
- How to read food package directions and use a food thermometer
Check the manual for basket capacity, permitted accessories, cleaning instructions, and any model-specific controls. Keep the air fryer on a stable, heat-resistant surface with the ventilation area clear. Follow food safety advice and the package instructions for the food you are cooking.
BLACK+DECKER Purifry 6QT Digital Air Fryer
The Purifry earns our top spot because its touchscreen is tied to the widest listed set of cooking choices here. Its nine one-touch presets cover fries, steak, fish, vegetables, snacks, chicken, baking, dehydrating, and reheating. That variety makes this a stronger fit for households that expect an air fryer to handle more than frozen sides. Compared with the single-basket Chefman, it offers substantially more named modes; compared with the dual-basket Chefman, it concentrates on cooking versatility in one basket rather than preparing two foods independently.Its 400°F maximum is the clearest limitation alongside Chefman’s models, which list a 450°F Hi-Fry option. That higher setting may appeal when extra crisping is the priority. The Purifry instead pairs air-fry, roast, bake, dehydrate, and keep-warm functions with dual convection fans, a shake reminder, and automatic shutoff. We should treat the listed cooking-time comparison with a conventional convection oven as a product claim, not a guarantee for every recipe or appliance.The touchscreen is most compelling for buyers who value variety and repeatable starting points. Still, presets are starting settings rather than a substitute for choosing portions and checking doneness. At nearly 14 inches deep and wide, this model also needs a counter spot with room around it. Its stainless-steel inner material and dishwasher-safe parts support cleanup, but shoppers seeking two separate cooking zones should choose the dual-basket Chefman instead.
Pros:
- Nine touchscreen presets span several cooking tasks
- Includes air fry, roast, bake, dehydrate, and keep-warm functions
- Shake reminder and automatic shutoff are listed
- Dishwasher-safe parts simplify cleanup
Cons:
- Maximum listed temperature is 400°F, below the Chefman models’ 450°F Hi-Fry option
- Its stated dimensions call for substantial counter space
- One basket cannot separate two foods into independent cooking zones
Best for: Households that want a touchscreen with many one-touch cooking modes for varied meals and snacks.
Not ideal for: Buyers who prioritize a 450°F crisping option, two independent baskets, or a smaller counter footprint.
Bottom line: Choose the Purifry when touchscreen variety matters more than maximum heat or dual-zone cooking.
“Choose the Purifry when touchscreen variety matters more than maximum heat or dual-zone cooking.”
Chefman 6 Quart Dual Basket Air Fryer
The dual-basket Chefman’s touchscreen earns its place through two independently controlled 3-quart baskets, not a long list of presets. We can cook different foods in separate zones, then use Sync Finish so both baskets complete at the same time. That solves a practical coordination problem: a side and a main can be ready together even when their cooking settings differ. For this kind of meal, it offers more flexibility than either single-basket model, including the more preset-rich Purifry.The controls list a 200–450°F temperature range and a Hi-Fry option for a crisp finish. Each basket is removable, nonstick, and top-rack dishwasher safe. Its combined six-quart capacity matches the other picks on paper, but it is divided between two smaller cooking spaces. That arrangement is useful for separation and timing, though it may be less convenient than one open basket for a single larger batch. The product information describes the countertop design as compact but provides no dimensions, so we should check available space before choosing it.There is a tradeoff in choosing zone flexibility over one-touch breadth. The supplied description highlights customizable settings and Sync Finish, but does not specify a preset count comparable to BLACK+DECKER’s nine. Buyers who want many named cooking modes may find the Purifry’s panel a better match; buyers who mostly prepare one food at a time may find the single-basket Chefman simpler. This pick makes the most sense when different foods and synchronized timing are regular needs.
Pros:
- Two independent 3-quart baskets separate foods and settings
- Sync Finish coordinates end times across baskets
- Listed temperature range reaches 450°F
- Removable baskets are top-rack dishwasher safe
Cons:
- The six-quart combined capacity is split into two smaller baskets
- The supplied details list fewer touchscreen presets than BLACK+DECKER
- Dimensions are not provided in the supplied product information
Best for: People who often prepare a main and side together and want separate settings with a synchronized finish.
Not ideal for: Cooks who usually make one large batch, want numerous listed presets, or need published dimensions before planning counter space.
Bottom line: Pick the dual-basket Chefman when cooking separate foods to finish together matters more than a broad preset menu.
“Pick the dual-basket Chefman when cooking separate foods to finish together matters more than a broad preset menu.”
Chefman Air Fryer 6 QT Compact
For a straightforward touchscreen routine, the single-basket Chefman keeps the controls focused: four presets plus direct time and temperature adjustment. It stands out from BLACK+DECKER by adding a 450°F Hi-Fry finish, which is designed for the final two minutes of cooking when we want extra crunch. Compared with Chefman’s dual-basket model, it gives up independent zones and Sync Finish in exchange for one uncomplicated cooking area. That is a sensible trade when most meals are a single batch rather than two foods with different timings.The listed six-quart capacity is intended to serve three to five people, and the narrow design is described as a way to reduce counter footprint. It still measures nearly 15 inches deep, so we should check depth as well as width before setting aside a spot. The audible shake notification prompts us midway through cooking, while automatic shutoff adds a practical end-of-cycle safeguard. A dishwasher-safe basket and rack make cleanup less involved, although nonstick surfaces still call for care to preserve their coating.Its touchscreen offers fewer one-touch choices than the Purifry, whose nine presets also include baking and dehydrating. The compact Chefman does not list those functions, so we should not choose it expecting a multi-mode countertop appliance. And because it has a single basket, it cannot match the dual model’s ability to cook two different foods independently. It is the best fit for shoppers who want simple digital controls, a high-heat finishing option, and an easy-to-clean basket without adding a second zone.
Pros:
- Direct touchscreen time and temperature adjustment with four presets
- 450°F Hi-Fry option for the final two minutes
- Audible halfway shake notification and automatic shutoff
- Basket and rack are dishwasher safe
Cons:
- Four presets offer less one-touch variety than BLACK+DECKER’s nine
- Single basket cannot cook two foods with separate settings
- Listed dimensions are narrow but relatively deep
Best for: Small households or everyday cooks who want a single six-quart basket, basic presets, and a higher-heat finishing option.
Not ideal for: Buyers who need two independent cooking zones, a large range of presets, or dedicated bake and dehydrate modes.
Bottom line: Choose this Chefman for a simpler single-basket touchscreen and high-heat crisp finish, rather than extensive modes or dual-zone timing.
“Choose this Chefman for a simpler single-basket touchscreen and high-heat crisp finish, rather than extensive modes or dual-zone timing.”
As an Amazon Associate we earn from qualifying purchases.
Before You Start
Unplug the appliance before cleaning or handling removable parts. The basket, tray, and heated surfaces can become hot during and after cooking; use oven mitts and set hot parts on a heat-safe surface. Keep the fryer away from water, curtains, and other items that could block airflow or contact hot surfaces. Do not use a damaged cord or appliance.
Touchscreen labels vary. A preset may choose a starting time and temperature, but it may not match your food’s size, amount, or brand. Use the manual and food packaging as your guide, and check the food as it cooks.
Step-by-Step Instructions
Step 1: Read the model instructions
Find the manual’s sections on setup, touchscreen controls, capacity, preheating, and cleaning. Identify how your model starts, pauses, changes settings, and signals that cooking has ended. Check which parts can go in a dishwasher, if any.
Tip: Do not assume that a control or cleaning method works the same way across brands.
Check: You can identify the controls you need and know how to remove and clean the basket and tray.
Step 2: Wash and dry removable parts
Unplug the fryer. Remove the basket and any tray or crisper plate that the manual says is removable. Wash those parts with warm water, mild dish soap, and a soft sponge, or use a dishwasher only if the manual permits it. Rinse and dry them fully. Wipe the appliance exterior with a damp cloth; do not immerse the main unit in water.
Tip: Avoid abrasive pads and metal utensils that can damage a nonstick coating.
Check: The removable parts are clean and dry, and the main unit has no water inside it.
Step 3: Position the fryer and connect power
Set the appliance on a level, heat-resistant surface. Leave the clearance around its air intake and exhaust openings specified in the manual. Keep it away from the edge of the counter and from items that could be affected by heat. Insert the dry basket and plug the fryer into a suitable outlet.
Tip: Do not place the exhaust close to a wall, cabinet, or anything that blocks hot air.
Check: The fryer sits steadily, the vents are open, and the cord is not stretched across a walkway or near a hot surface.
Step 4: Prepare food for the basket
Cut food into pieces of similar size so they cook at a similar rate. Pat wet ingredients dry when appropriate. Add only a light coating of oil if the recipe calls for it; do not pour oil into the fryer chamber. Leave space between pieces and stay within the basket’s fill limit in the manual.
Tip: Overfilling blocks airflow and can leave food unevenly cooked. Cook in batches if the basket is crowded.
Check: The food is arranged in a loose layer, or in the spacing recommended by your recipe, without exceeding the fill limit.
Step 5: Choose a setting and enter the cooking time
Tap the power button, then select a suitable preset or set the temperature and time manually. Use the recipe or food package directions as a starting point, adapting them to your model’s instructions. If you do not know how the fryer compares with the stated cooking method, check a trusted air fryer recipe or the manual instead of guessing. Use the touchscreen’s plus and minus controls to adjust settings, then start the cycle.
Tip: A preset is a starting point, not proof that food is done. Some models require you to press Start after selecting a preset.
Check: The display shows the intended temperature and time, and the fryer indicates that cooking has begun.
Step 6: Turn or shake food when needed
When the timer is halfway through, pause the cycle if your model requires it before opening the drawer. Wearing oven mitts, remove the basket carefully. Shake small pieces or turn larger pieces with heat-safe tongs, then return the basket and resume cooking.
Tip: Some foods do not need turning. Follow your recipe and manual, and keep your hands clear of hot surfaces and escaping steam.
Check: Food that benefits from turning has been repositioned, and the cycle has resumed.
Step 7: Check for doneness before serving
When the fryer signals the end of the cycle, remove the basket carefully. Check the food’s appearance and texture, then use a food thermometer for meat, poultry, and other foods where a safe internal temperature matters. Check the thickest part without touching bone. If food needs more cooking, return it to the basket and add a few minutes, then check again.
Tip: Do not rely on browning alone to judge whether food is safely cooked.
Check: The food meets the recipe’s doneness cues and, where applicable, the recommended safe internal temperature.
Step 8: Switch off and clean after cooking
Turn off the fryer and unplug it when safe to do so. Let the basket and tray cool before washing them as directed in the manual. Wipe away grease or food residue with a soft sponge and mild soap. Wipe the interior carefully without soaking the heating element, then dry all parts before storing or reassembling the fryer.
Tip: Cleaning after each use helps prevent residue and grease from affecting later cooking.
Check: The appliance is off, the removable parts are clean and dry, and no loose residue remains in the basket or chamber.
Common Mistakes to Avoid
- Filling the basket too full. — Keep food within the model’s fill limit and leave room for air to circulate; cook extra portions in batches.
- Treating a preset time as a guaranteed doneness result. — Use package or recipe guidance, check the food near the end of cooking, and measure internal temperature when food safety calls for it.
- Using too much oil or adding oil to the fryer chamber. — Apply a small amount directly to food only when needed; follow the manual’s directions.
- Cleaning the basket while it is hot or using an abrasive scrubber. — Let parts cool and use a soft sponge, mild soap, and only cleaning methods approved for your model.
Troubleshooting
Problem: The touchscreen does not respond or the fryer will not start.
Solution: Check that the plug is fully seated and the outlet works. Make sure the basket is inserted correctly if the model has a safety interlock. Follow the manual’s instructions for unlocking or resetting the controls; stop using the fryer if the panel or cord appears damaged.
Problem: Food is pale, soft, or unevenly cooked.
Solution: Check whether the basket is crowded, then cook a smaller batch with space between pieces. Turn or shake food partway through if appropriate. Add a few minutes and check again rather than extending the time substantially without inspecting the food.
Problem: The fryer produces smoke.
Solution: Pause or stop cooking if smoke is heavy. Once it is safe, check for excess grease or food residue and clean the cooled basket and chamber. For naturally fatty foods, follow the manual’s advice for managing drippings. If smoke continues with a clean fryer, switch it off, unplug it, and contact the manufacturer.
Problem: The food is cooked outside but not in the center.
Solution: Cut pieces more evenly and reduce crowding. Lower the temperature and cook for longer if the recipe or manual supports that adjustment. Check the center with a thermometer when appropriate.
What Success Looks Like
You have used the touchscreen to select a cooking setting, cooked food in a basket that allows airflow, and checked doneness before serving. The food matches the recipe’s doneness cues and reaches a safe internal temperature where one applies. Afterward, the fryer is switched off and unplugged, and its cooled removable parts are clean and dry.
Next Steps
Record settings that work well for foods you cook often, including the amount and thickness, since those details affect cooking. Check the basket and heating area for residue after each use, and clean them according to the manual. If cooking results change, inspect for blocked vents, crowded loads, or built-up grease before changing several settings at once. Contact the manufacturer for persistent control faults, unusual smoke, or damage.
Frequently Asked Questions
Do I need to preheat a digital touchscreen air fryer?
Check your model’s manual and recipe. Some recipes call for preheating, while some models offer a preheat setting or account for preheating in their instructions. Follow the directions for your fryer and food.
Can I use the preset buttons for every food?
You can use a preset as a starting point when it matches the food, but check the manual and recipe guidance. Food size, quantity, and starting temperature can change the cooking time, so check doneness before serving.
Should I put oil in the basket?
Do not pour oil into the fryer chamber. If a recipe needs oil, apply a small amount to the food as directed and follow your model’s manual.
Why does the fryer pause when I pull out the basket?
Many models pause when the basket is removed for safety. Return the basket to resume, or use the touchscreen controls described in the manual if the cycle does not continue automatically.
How often should I clean the air fryer?
Clean the basket and tray after each use once they have cooled. Check the manual for how to clean the interior and heating area, and avoid soaking or immersing the main unit.