
Chocolate tempering is a simple process where you heat, cool, and gently reheat chocolate to give it a shiny look, a satisfying snap, and a smooth feel. You start by melting the chocolate to a specific temperature, then cool it down to form stable crystals. After that, you warm it slightly so it’s ready to use. Doing this correctly makes your chocolates look professional and taste better. Keep going if you want to learn the detailed steps behind perfect tempering.
Key Takeaways
- Tempering involves carefully melting and cooling chocolate to stabilize its cocoa butter crystals for a shiny finish.
- Use a thermometer to ensure precise temperatures during melting, cooling, and reheating.
- Proper tempering gives chocolate a firm snap, smooth surface, and prevents dull or streaky appearance.
- The process includes melting chocolate, cooling it down, then gently reheating to working temperature.
- Correctly tempered chocolate is ideal for making candies, decorations, and professional-looking desserts.
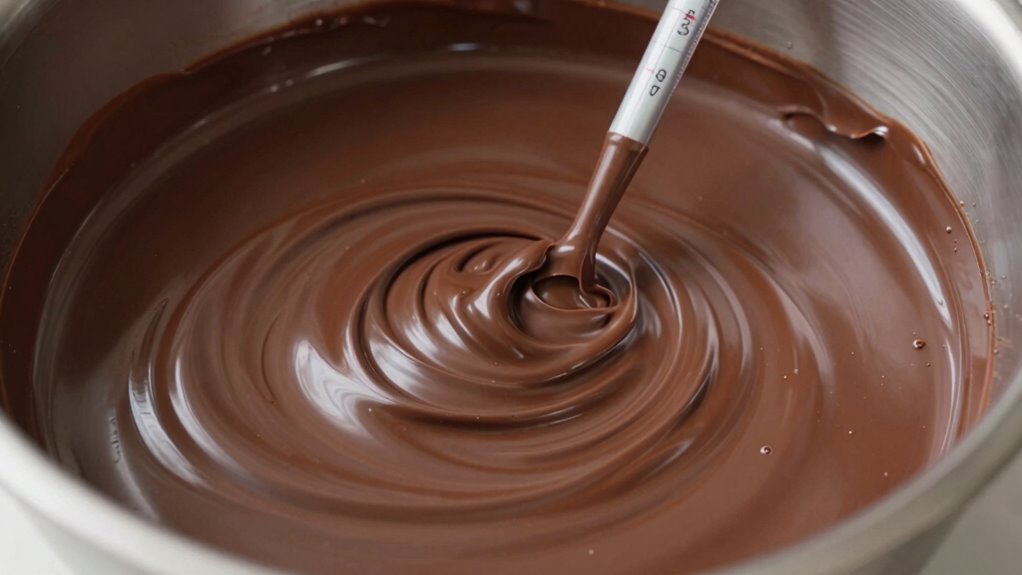
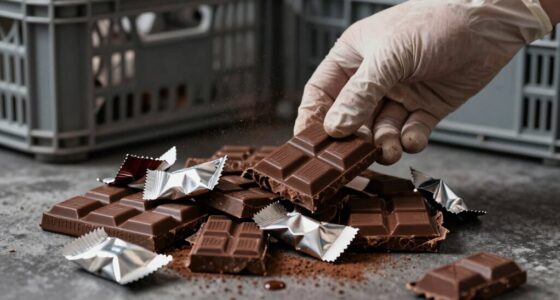
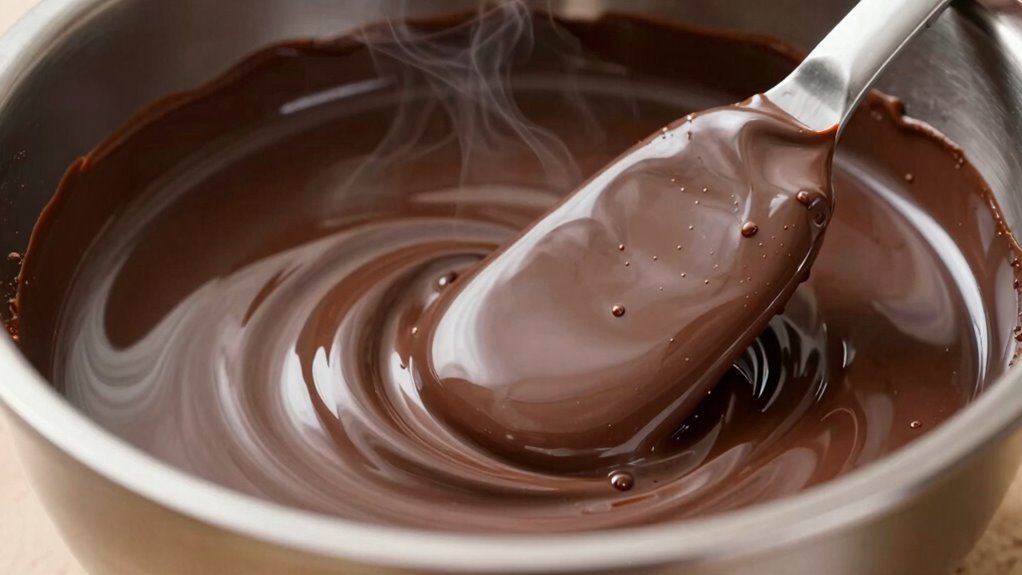
Have you ever wondered why some chocolates have that glossy finish and satisfying snap? The secret lies in a process called chocolate tempering, which is indispensable in candy making and dessert decoration. Tempering is a method of heating and cooling chocolate to stabilize its cocoa butter crystals, giving it that perfect texture and shine. When done correctly, tempered chocolate will set with a firm bite, a beautiful sheen, and a smooth surface that’s ideal for coating candies, making chocolates look professional, and creating stunning dessert decorations.
Getting started with chocolate tempering might seem tricky at first, but once you understand the basics, it becomes much easier. You’ll need high-quality chocolate, a thermometer, and a heat-resistant spatula. The process involves melting the chocolate to a specific temperature, then cooling it just enough to encourage the formation of stable cocoa butter crystals. This is vital because untempered chocolate can turn dull, streaky, or develop a dull finish over time. Properly tempered chocolate, on the other hand, remains glossy and resists melting at room temperature, making it perfect for coating truffles, ganache, and other confections.
Tempered chocolate stays glossy, resists melting, and gives confections a professional, flawless finish.
For candy making, tempering guarantees that your chocolates will have that satisfying snap when you bite into them. The process also makes the chocolate more resistant to melting, which is especially helpful if you’re shaping or molding chocolates for gifts or special occasions. When you’re working on dessert decoration, tempered chocolate can be used to pipe intricate designs or to create beautiful chocolate garnishes. Its glossy finish adds a professional touch to cakes and pastries, elevating the overall presentation. Understanding cocoa butter crystals is essential for mastering the art of tempering.
The key to successful tempering is precision. You’ll heat the chocolate gently, stirring constantly, until it reaches the right temperature—usually around 110°F (43°C) for dark chocolate, slightly lower for milk or white chocolates. Then, you cool it down carefully, often by adding small amounts of unmelted chocolate or cooling it on a marble surface, until it reaches a lower temperature that promotes crystal formation. Finally, you gently reheat the chocolate just to the right working temperature, guaranteeing it’s ready for use. Achieving consistent results in tempering also depends on temperature control, which is why a reliable thermometer is essential. Additionally, understanding temperatures for different chocolates helps in achieving the perfect temper every time. Proper technique and temperature regulation are what set professional chocolates apart from amateurs.

Digital Infrared Thermometer gun for cooking,BBQ,Pizza oven,Ir Thermometer with Backlight,-58℉~932℉(-50℃~500℃) Handheld Non Contact Heat Laser Temperature Gun (Not for Human)
Temperature measurement range:-50℃-500℃ (-58℉-932℉)Display resolution: 0.1 ℃ or 0.1 ℉
As an affiliate, we earn on qualifying purchases.
As an affiliate, we earn on qualifying purchases.
Frequently Asked Questions
Can I Temper Chocolate Without a Thermometer?
Yes, you can temper chocolate without a thermometer by using alternative methods. Focus on observing the chocolate’s appearance and texture—look for a glossy finish and smooth consistency. You can also use the seeding method, adding small amounts of melted chocolate to control temperature. Remember, the goal is to develop that perfect chocolate flavor with a shiny, crisp snap, even if you don’t have a thermometer on hand.
How Long Does Tempered Chocolate Stay Glossy?
Ever wonder how long that glossy finish lasts? Well, tempered chocolate stays shiny for about a week if stored properly. To maximize its flavor enhancement and appearance, keep it in a cool, dry place, airtight container, away from direct sunlight. Proper storage tips prevent dullness and blooming. Do you want your chocolates to look as tempting as they taste? Then, handle them with care and enjoy within this timeframe.
Is It Okay to Re-Temper Chocolate?
Yes, you can re-temper chocolate if needed. Proper chocolate storage and handling can affect its temper, so re-tempering helps restore its glossy appearance and smooth texture. To do this, gently reheat the chocolate to the right temperature, then cool it back down, ensuring it maintains flavor preservation and a shiny finish. Re-tempering is especially useful if your chocolate becomes dull or develops a bloom, ensuring it looks and tastes great.
What’s the Best Type of Chocolate for Tempering?
Think of choosing chocolate for tempering like picking the perfect paintbrush—you want quality and precision. The best type is dark chocolate with at least 70% cocoa content, offering rich flavor and easier tempering. Its balanced cocoa flavor guarantees a glossy finish and stable texture. Milk or white chocolates can be tricky due to their higher sugar and milk content, making them less ideal for smooth, professional results.
Can I Temper Chocolate in a Microwave?
Yes, you can temper chocolate in a microwave. Just chop your chocolate into small, even pieces and microwave in short bursts, stirring frequently. This method allows you to work quickly, making it easier to achieve a glossy finish and proper texture for chocolate molds. Proper tempering enhances flavor and gives your chocolates a professional look, ensuring they snap nicely and have a smooth, shiny surface.
silicone chocolate mold
As an affiliate, we earn on qualifying purchases.
As an affiliate, we earn on qualifying purchases.
Conclusion
Mastering chocolate tempering elevates your confections to a refined level, subtly whispering of craftsmanship and care. When you embrace the delicate dance of temperature control, you create a glossy, firm finish that invites admiration. With patience and attention, you weave a touch of elegance into every piece. Remember, the true art lies in the gentle harmony of heat and patience—transforming simple ingredients into a symphony of sweetness that charms and delights.
chocolate tempering kit
As an affiliate, we earn on qualifying purchases.
As an affiliate, we earn on qualifying purchases.
high-quality dark chocolate for tempering
As an affiliate, we earn on qualifying purchases.
As an affiliate, we earn on qualifying purchases.