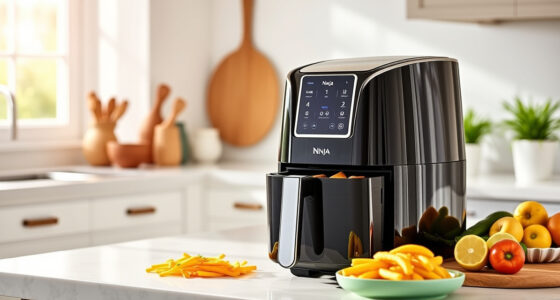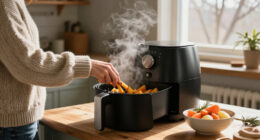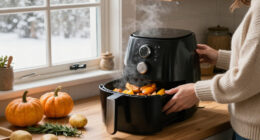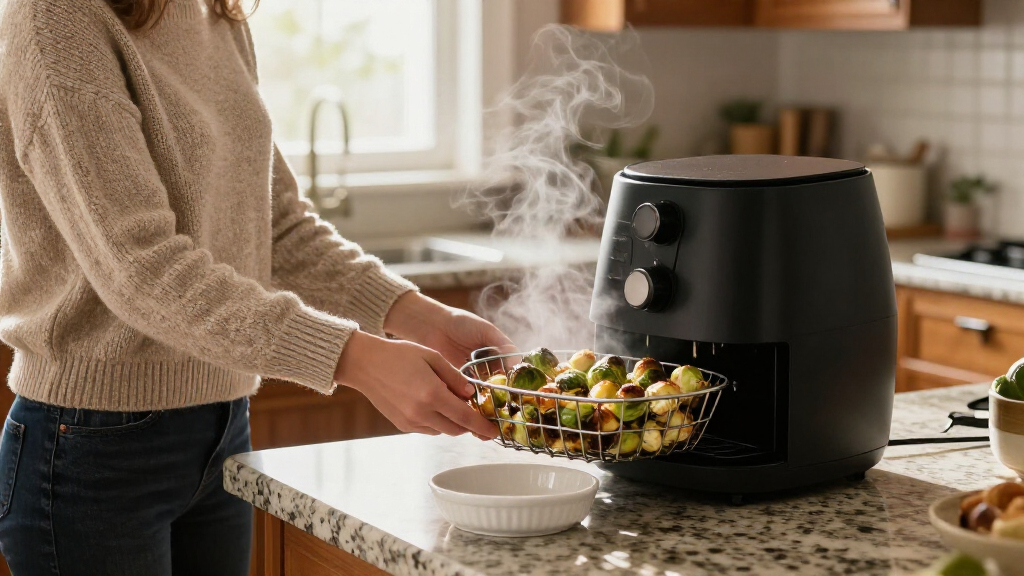
Winter cooking often relies on slow-roasting and braising, methods that can take hours and heat up your entire kitchen. The air fryer offers a faster, more energy-efficient alternative for many traditional winter dishes. This guide teaches you how to adapt classic winter ingredients—root vegetables, tough cuts of meat, and hearty grains—to the air fryer basket. You will learn to achieve crispy exteriors and tender interiors without preheating a large oven. This approach is ideal for small households, apartment dwellers, or anyone seeking to reduce energy consumption during the colder months. By following these steps, you will produce meals that are as comforting and satisfying as oven-roasted dishes, but prepared in a fraction of the time.

Get kitchen gear delivered free with Prime
- Fast, free delivery on millions of items
- Prime Video, Amazon Music and more included
- Member-only deals all year

GRANITESTONE 16 Qt Large Glass Air Fryer Non Toxic, Silver
- ✔ Capacity: 16 Quarts
- ✔ Material: Glass and Stainless Steel
- ✔ Wattage: 1200 Watts

Chefman Air Fryer 6-in-1, XL 14-Quart Multifunctional Airfryer with Touchscreen Controls, Rotisserie, Food Dehydrator, Convection…
- ✔ Capacity: 14 Quarts
- ✔ Material: Metal and Plastic
- ✔ Wattage: 1700 Watts

Chefman Air Fryer 9 Qt | TurboFry 7-in-1 High-Powered 450°F Cooking for Crispier and Even Results | XL Basket with Viewing Window…
- ✔ Capacity: 9 Quarts
- ✔ Material: Nonstick Coating
- ✔ Wattage: 1750 Watts
Difficulty: Beginner | Time: 45-60 minutes per meal
What You’ll Need
Tools & Materials:
- Air fryer with at least 4-quart capacity
- Silicone or metal tongs
- Instant-read thermometer
- Small mixing bowls
- Silicone brush for oil application
Knowledge:
- Basic food safety regarding internal temperatures for meat
- Understanding of how to read your specific air fryer’s temperature and time controls
Ensure your air fryer basket is clean and dry before starting. Winter foods often have higher moisture content (like potatoes or squash), which can lead to steaming if the basket is overcrowded. Preheat your air fryer for at least 3-5 minutes before adding food to ensure immediate searing.
GRANITESTONE 16 Qt Large Glass Air Fryer Non Toxic, Silver
This model redefines the air fryer category by using a crystal-clear glass bowl instead of an opaque basket. For winter cooking, this transparency is a game-changer; you can monitor the browning of a winter squash or the crispiness of roast potatoes without opening the door and releasing precious heat. The 16-quart capacity is significantly larger than the Chefman options, allowing you to use its three stainless steel racks to cook a protein, a starch, and a vegetable simultaneously. This multi-level capability reduces cooking shifts, a common frustration during busy holiday weeks. Unlike the plastic-and-metal construction of the Chefman units, the GRANITESTONE is completely free of Teflon and PFAS, appealing to buyers who avoid nonstick coatings. However, the glass construction requires more careful handling to avoid thermal shock or breakage, and the unit has a larger footprint that may dominate smaller countertops. While it lacks the rotisserie function found in the Chefman 14-Quart XL, its ability to bake and roast on multiple levels makes it a formidable all-in-one solution for large households seeking a safer, non-toxic cooking environment.
Pros:
- Glass bowl allows visual monitoring without heat loss
- Non-toxic, Teflon-free cooking surfaces
- Three racks enable simultaneous multi-dish cooking
Cons:
- Glass construction requires careful handling
- Larger footprint than basket-style fryers
- No rotisserie function for whole birds
Best for: Large families and health-conscious cooks who prioritize non-toxic materials and multi-dish capacity.
Not ideal for: Users with small kitchens or those who want to roast whole chickens on a spit.
Bottom line: This pick makes the most sense for those who want to see their food cook and avoid nonstick chemicals, even if it means sacrificing rotisserie capabilities.
“This pick makes the most sense for those who want to see their food cook and avoid nonstick chemicals, even if it means sacrificing rotisserie capabilities.”
Chefman Air Fryer 6-in-1, XL 14-Quart Multifunctional Airfryer with Touchscreen Controls, Rotisserie, Food Dehydrator, Convection…
If your winter menu includes whole chickens, roasts, or dehydrated snacks, the Chefman 6-in-1 XL is the most versatile option in this lineup. It functions as a convection oven and air fryer hybrid, featuring a dedicated rotisserie spit that allows for hands-free roasting of larger proteins—a feature completely missing from both the GRANITESTONE and the TurboFry. The 14-quart interior is spacious enough for a whole bird, and the three rack positions offer flexibility for side dishes. The touchscreen controls provide a modern, intuitive interface that simplifies switching between air frying, baking, and dehydrating. While it shares a similar temperature ceiling with the GRANITESTONE (400°F), it falls short of the TurboFry’s high-heat capabilities. The build is primarily metal and plastic with nonstick coated racks, which are convenient for cleanup but lack the non-toxic assurance of the glass model. This unit is ideal for those who want to replace their toaster oven and rotisserie with a single appliance, though its bulkier size and nonstick coatings may not suit minimalists or those strictly avoiding coated surfaces.
Pros:
- Includes a rotisserie spit for whole birds
- Dehydration function for winter snacks
- Intuitive touchscreen interface
Cons:
- Nonstick coated racks may wear over time
- Lower max temperature than TurboFry
- Bulky design takes up significant counter space
Best for: Home cooks who want to roast whole chickens and dehydrate foods alongside air frying.
Not ideal for: Those who prefer a compact footprint or strictly non-stick-free cooking surfaces.
Bottom line: This model is better suited to cooks who value multi-functionality, particularly the rotisserie and dehydrator, over raw speed or non-toxic materials.
“This model is better suited to cooks who value multi-functionality, particularly the rotisserie and dehydrator, over raw speed or non-toxic materials.”
Chefman Air Fryer 9 Qt | TurboFry 7-in-1 High-Powered 450°F Cooking for Crispier and Even Results | XL Basket with Viewing Window…
For those who prioritize speed and texture, the Chefman TurboFry stands out with its ability to reach 450°F, a full 50 degrees hotter than the other two models. This higher temperature, powered by a DC motor, allows it to cook up to 40% faster, making it an excellent choice for quick winter weeknights where you need crispy frozen fries or chicken nuggets in minutes. The 9-quart capacity is smaller than the other picks, making it more suitable for households of up to four people or those with limited counter space. The viewing window allows you to check on food without opening the basket, though it lacks the full-bowl visibility of the GRANITESTONE. While it offers seven functions, including a dedicated "Frozen" mode that optimizes cooking for store-bought snacks, it lacks the rotisserie and multi-rack layering of the larger models. This unit is the most compact and fastest, but it sacrifices the large-batch capacity and specialized roasting features of its siblings, making it best for those who value efficiency over expansive cooking versatility.
Pros:
- Highest max temperature at 450°F
- Fastest cooking times due to DC motor
- Compact footprint for smaller kitchens
Cons:
- Smallest capacity at 9 quarts
- No rotisserie or multi-rack stacking
- Nonstick coating requires careful maintenance
Best for: Busy households who want the fastest cooking times and highest crispiness for frozen foods.
Not ideal for: Large families or those who need to cook multiple dishes at once or roast whole chickens.
Bottom line: This pick makes the most sense for speed-focused cooks who want restaurant-style crispiness without the bulk of larger ovens.
“This pick makes the most sense for speed-focused cooks who want restaurant-style crispiness without the bulk of larger ovens.”
As an Amazon Associate we earn from qualifying purchases.
Before You Start
Winter ingredients vary in density and moisture content. Unlike summer produce, root vegetables are dense and require higher temperatures to caramelize rather than steam. Check your air fryer’s maximum temperature setting; most models go up to 400°F (200°C), which is sufficient for most winter tasks. Gather all ingredients before you begin, as air fryer cooking moves quickly and you cannot pause the process to chop vegetables. Cut all produce to uniform sizes to ensure even cooking.
Step-by-Step Instructions
Step 1: Prepare Dense Root Vegetables
Peel and cut winter root vegetables such as potatoes, carrots, parsnips, or turnips into uniform pieces, roughly 1-inch cubes. Place them in a mixing bowl. Drizzle with olive oil or avocado oil and toss until every piece is lightly coated. Season with salt, pepper, and hardy herbs like rosemary or thyme. Avoid using wet marinades, as excess liquid causes steaming rather than crisping.
Tip:Soak cut potatoes in cold water for 10 minutes and pat them completely dry before oiling. This removes surface starch, leading to a crispier exterior.
Check: The vegetables are coated in a thin, even layer of oil with no pooling liquid at the bottom of the bowl.
Step 2: Load the Basket Without Overcrowding
Preheat your air fryer to 400°F (200°C) for 3 minutes. Arrange the prepared vegetables in a single layer in the air fryer basket. Do not stack or pile them. If you have too many vegetables to fit in one layer, cook them in batches. Overcrowding traps steam, resulting in soggy, pale vegetables instead of roasted, caramelized ones.
Tip:If you must cook in batches, keep the first batch warm in a low oven (200°F) while the second batch cooks, but expect a slight loss of crispiness.
Check: Each piece of vegetable has visible space around it. You can see the bottom of the basket between the pieces.
Step 3: Cook with Intermediate Shaking
Insert the basket and cook for 15-20 minutes, depending on the size of the cuts. Halfway through the cooking time, pull the basket out and shake it vigorously to redistribute the vegetables. This ensures all sides are exposed to the hot air circulation. For denser vegetables like parsnips, you may need an additional 5 minutes.
Tip:Use tongs to rearrange any pieces that appear to be browning too quickly on one side. Rotate them for even color.
Check: The vegetables are golden brown on the outside and easily pierced with a fork without resistance.
Step 4: Season Hearty Proteins for Winter
Pat chicken thighs, pork chops, or salmon fillets dry with paper towels. Rub with a winter-appropriate spice blend such as paprika, garlic powder, onion powder, and black pepper. Lightly coat with oil. Place the protein in the air fryer basket in a single layer, ensuring the skin or fattiest side faces up if applicable.
Tip:For chicken skin, brush with a tiny amount of baking powder mixed with oil before seasoning. This draws out moisture for extra crispiness.
Check: The protein surface is dry to the touch and evenly coated with spices.
Step 5: Cook Proteins to Safe Internal Temperatures
Cook chicken thighs at 375°F (190°C) for 18-22 minutes or pork chops at 375°F for 10-12 minutes. Flip the protein halfway through the cooking time. Use an instant-read thermometer to check the internal temperature before removing. Chicken should reach 165°F (74°C) and pork 145°F (63°C) followed by a 3-minute rest.
Tip:Let the meat rest for 5 minutes after cooking. This allows juices to redistribute, preventing dry meat when sliced.
Check: The thermometer reads the correct safe temperature at the thickest part of the meat, and the juices run clear.
Step 6: Refresh Sides and Reheat Leftovers
Use the air fryer to reheat winter sides like roasted Brussels sprouts, cauliflower steaks, or leftover mashed potatoes. Set the temperature to 350°F (175°C). Spray or brush leftover items lightly with oil to prevent drying out. Cook for 3-5 minutes until heated through and re-crisped.
Tip:For mashed potatoes, make small patties or ‘cakes’ to increase surface area for crisping.
Check: The food is hot in the center and has a refreshed, crispy texture on the exterior.
Common Mistakes to Avoid
- Overcrowding the basket with dense winter vegetables. — Always cook in single layers. If you have a large family, invest in a larger air fryer or cook in multiple batches. Steam is the enemy of crispiness.
- Skipping the preheat step. — Always preheat for at least 3 minutes. Cold air fryers start by steaming the food, which prevents the Maillard reaction (browning) from occurring efficiently.
- Using wet marinades on vegetables. — Pat vegetables dry before oiling. Use dry spice rubs or light oil coatings. If using a marinade, drain and wipe off excess liquid before cooking.
- Ignoring the need to shake or flip. — Air fryers cook from the outside in. Shaking ensures even exposure to heat. Set a timer for the halfway mark to remind yourself.
Troubleshooting
Problem: Vegetables are soft but not browned.
Solution: Your air fryer may not be hot enough, or the basket was overcrowded. Increase the temperature to 400°F, reduce the amount of food, and ensure pieces are smaller and more uniform.
Problem: Protein is dry on the outside but raw inside.
Solution: The pieces were likely too thick. Cut proteins into smaller, more uniform sizes. Alternatively, lower the temperature to 350°F and increase the cooking time to allow heat to penetrate without burning the exterior.
Problem: Smoke is coming from the air fryer.
Solution: This is often caused by excess oil dripping onto the heating element. Reduce the amount of oil used. Place a small piece of bread or a few slices of potato at the bottom of the basket to absorb grease, or use a liner designed for air fryers.
Problem: Food is sticking to the basket.
Solution: Ensure the basket is clean and seasoned if required by the manufacturer. Use a silicone brush to apply oil directly to the basket surface before adding food, not just on the food itself.
What Success Looks Like
You have successfully prepared a complete winter meal featuring crispy, caramelized root vegetables and juicy, fully cooked protein. The vegetables have a golden-brown crust and tender interior, while the meat has reached safe internal temperatures without being dry. The entire cooking process took less than 45 minutes, and your kitchen remained cool compared to traditional oven use.
Next Steps
After cooking, allow the air fryer to cool completely before cleaning. Wash the basket and tray with warm, soapy water or place them in the dishwasher if labeled safe. Wipe the exterior with a damp cloth. Experiment with other winter staples like butternut squash wedges or Brussels sprouts with balsamic glaze. Consider making a batch of seasoned root vegetable medley for meal prep, storing them in airtight containers for quick reheating throughout the week.
Frequently Asked Questions
Can I cook frozen winter vegetables in the air fryer?
Yes, but do not thaw them first. Cook from frozen at 400°F (200°C) for 15-20 minutes. Shake the basket halfway through. You may need to add a little extra oil since frozen vegetables often lack surface fat.
Do I need to use parchment paper in the air fryer for winter dishes?
You can use perforated parchment paper liners specifically designed for air fryers to make cleanup easier. However, ensure the paper does not block air vents or touch the heating element, as this creates a fire hazard. For best crisping, skip the liner.
Why are my Brussels sprouts turning out soggy?
Brussels sprouts have high water content. Ensure they are cut in half to release moisture, do not overcrowd the basket, and preheat the air fryer. If they are still soggy, try tossing them in a bit of cornstarch along with the oil to absorb surface moisture.
Can I make winter soups in the air fryer?
You cannot boil liquids in an air fryer. However, you can roast the soup ingredients (onions, carrots, squash) in the air fryer to deepen their flavor before transferring them to a pot of broth on the stove.
How do I clean grease from the air fryer after cooking fatty meats?
Let the grease cool and solidify. Remove the excess with a paper towel. Wash the basket with hot, soapy water and a non-abrasive sponge. For stubborn grease, soak the basket in hot water with a drop of dish soap for 10 minutes before scrubbing.